An intro to Octopus's Garden
- Piecing: the swirls are hand-pieced, NOT appliquéd! Squares were machine-sewn.
- Quilting: on domestic machine
- Full data for this quilt: http://domesticat.net/quilts/octopus-garden
- Full photoset for this quilt on Flickr
- Created by Amy Qualls, of domesticat.net and Portland, Oregon
- Finished size is 256" around, so entered in the "Small Quilt" category
A (re-)introduction
As part of the Bloggers' Quilt Festival, I need to write up a new piece about the quilt I'm entering, so I thought I'd do a single recap about Octopus's Garden, which I completed a few months ago.
What IS that pattern?
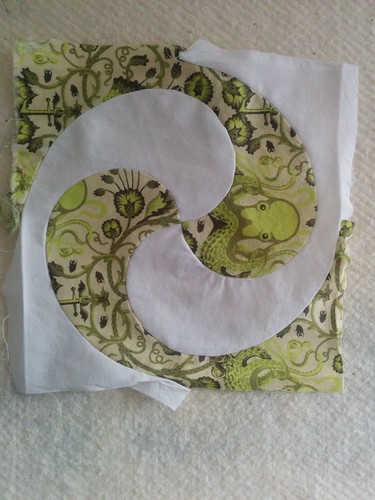 Because I am batshit crazy that's why!
The "swirl" pattern is an old one. No idea on who originally made it, but it's been around a long time. I first encountered it in All Quilt Blocks Are Not Square, by Debra Wagner, where it was called "Candy Swirl." I eventually tracked down two blog posts by Barbara Brackman, which provide some evidence that the pattern has been around, albeit rare, since around the 1890s:
- Barbara Brackman: "Mystery Pattern: Swirl"
- Barbara Brackman: "More on the Swirl Design"
All Quilt Blocks Are Not Square contains a template you can trace and use, and Ardco templates offers a metal template you can purchase. (I am working from the Ardco template.) Update, 2018: that link is now dead, but the template can still be purchased at http://stores.cottonstop.com/swirls-8/
I can understand why few people have tackled it. Those curves look really, really nasty. I will admit that a few years ago, I tried to machine-piece the block and created a ragged, miserable failure that was better not discussed or shown to anyone except my cat. I put the template away and muttered, "Someday. Someday I will PROVE that I can do this pattern."
It's doable. My technique was wrong.
Why this pattern? Why this fabric?
When I learned that a coworker and his wife were expecting their first child, I remembered his love of all things tentacly and pulled out a set of sea-creature fabrics to show him. He gravitated to the yellow-green and white fabric a mutual coworker/friend had given me as a gift, part of Tula Pink's Salt Water line. I didn't notice the title of the pattern until much later.
The requested image size is not available for this photo on Flickr (uploaded when this size was not offered yet). Try another size or re-upload this photo on Flickr.
I can't articulate why I went to this pattern piece after having it stored for so long. Maybe it made me think of tentacles. Maybe it made me think of drifting seaweed. Maybe I just wanted a challenge. I've been itching to push myself, to challenge my skillset, and I decided it was time. I remembered my disastrous attempt to machine-piece the pattern, and opted to do this one by hand. To me, that implied English paper piecing, which I'm very comfortable with after a few projects; it's great for accuracy, but I'd never done it with curves. No EPP templates for this pattern exist, so I chose to make my own.
How I assembled the swirls
First, I used the template to roughly cut out each piece from the fabric. I had success with leaving the 'foot' of each piece unusually long, to facilitate trimming:
I bought a single sheet of Mylar from a craft store, and traced the finished size of the piece onto the Mylar with the finest-tipped Sharpie I had. I made four, and numbered them so I could keep track in case any of them proved problematic. (They didn't.) Using Mylar instead of paper meant I had a semi-permanent piece, and permanent as long as I was reasonably careful; I did not want to make more pieces than absolutely necessary. Cutting accurately is essential for the pieces to fit properly. Here's what the same piece looks like with the Mylar template overlaid:
The next step is to get the fabric to conform to the template, and I realized I needed a hybrid approach. The top outer curve, the 'head' of the swirl, could be done drawstring-style, like this:
Being a perfectionist, I felt that everything came down to having a sharp, perfect point where all four swirls met in the center, so I started there. I made a quilter's knot with my thread, folded the fabric over the point, and made a single backstitch to secure the point. I would then do a very loose running stitch down the head of the piece, until I reached the section I thought of as the "neck" of the piece. At that point, where the piece began to narrow, I would work back and forth, using a technique I've always called "corset lacing" in my head. I need the lines to be far enough apart that I can handstitch around them without frustration, but I need the pieces to reasonably conform to the template and hold steady. When fully corset-laced, it would look like this:
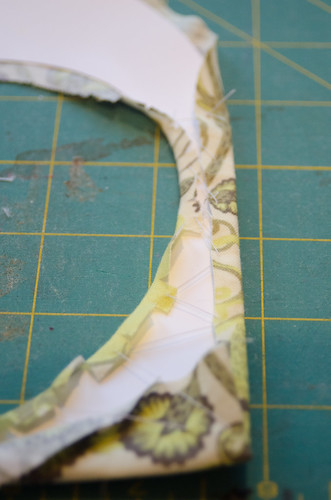
Those inner curves are problematic, though; there's one on the underside of the head, and one at the foot of the piece. I liked having big seam allowances to make sure I had enough room to trim the piece down afterward, but big seam allowances and inside curves do not mix; when corset-laced, they won't adhere tightly to the template unless you clip the curves. Accept this. If you're doing this pattern, you ARE clipping curves. I do not believe this pattern can be done without it:
I would lace up four pieces, and start fitting them together to make the square, anchoring each one in place, one at a time, and hand-sewing them together:
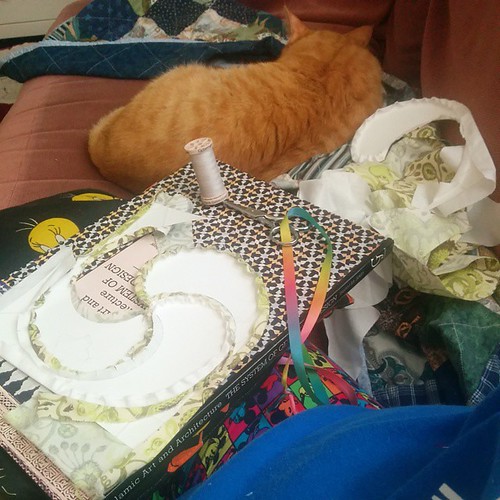 Work on the swirly #quilt continues. Kolohe supervises with his eyes closed.
(Kolohe is, of course, supervising.)
I would lay the wrapped templates flat on a book (the one shown is the widest and lightest book I have) and fit them together with my hands, then stitching back and forth to anchor the fabric together. My needles won't pierce Mylar, so it was easy to not stab the templates. Once all four pieces were done, I'd flip the piece over, verify I had a razor-sharp center point and good clean curves, and then remove the basting thread and template pieces for reuse. (Basting thread from the previous square became sewing thread for the next square. This paragraph also glosses over the triumphant slapping of the finished block onto my design wall, but that's a personality quirk you may or may not share.)
I will say from the outset: this method is slow. Very slow. From cutting to lacing to fitting to sewing to removing basting thread and template, each piece took me about 90 minutes to complete, but I rarely had to redo anything except the last few stitches of the 'foot' of the piece. Leaving extra-long bottom and exterior seam allowances left me with pieces that looked ragged, like this, but were clearly accurately pieced:
 Because I am batshit crazy that's why!
When I completed the first four, it was clear that even with ragged edges, I had an accurate set of templates and could proceed:
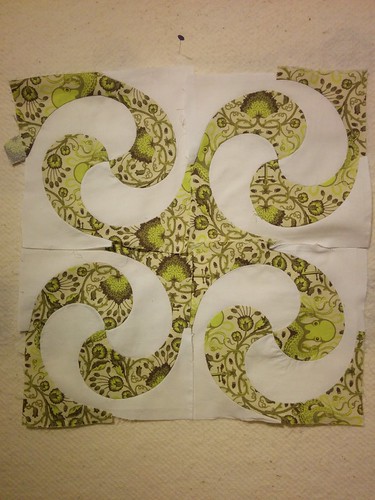 Raw edges but a decent demo of four blocks, untrimmed
I was very careful with my fabric pressing, removing the basting threads so the seam allowance could flip in either direction, and pressing as much of the seam allowance to the dark side as possible. I then took my square ruler and marked the finished size of the square with a pencil, making sure the center of the finished piece was absolutely in the center of the square. After pressing and marking, I trimmed the seam allowances down to my standard quarter-inch, for assembling on my sewing machine.
The dismount quandary
I realized something at this point, though: I needed a dismount. I didn't think I wanted the pattern to cut off at the edge of the quilt, so that meant I needed a set of special squares -- ones that only had one green swirl and three white, to finish off the interior figures without starting another at the edge. I went back to my Mylar and carefully traced out one more pattern from my template -- one that had the equivalent of two swirls joined together instead of just one. I suspected it would save me a decent amount of labor by removing one curved seam, and I was right; the border pieces took me a little closer to 60 minutes to make instead of the 90 for a four-swirl square.
Once I'd made a few border pieces, I pressed, marked, and trimmed a few border and interior pieces so I could have the reward of seeing them all come together, and it was intensely encouraging to see clean swirling lines emerge. Finishing the swirls, instead of cutting them off, was absolutely the right choice for this top:
The finished quilt is a 6x10 grid, so 48" x 80".
It's a green octopus fabric, made for someone who loves all things octopus and squid. It took about five seconds to name it "Octopus's Garden." A few weeks later, I looked at the selvage of the fabric and learned, to my amusement, that my source fabric's name was "Octo Garden." Clearly, the theme was there all along, just waiting for me to spot it.
Considering trying this pattern yourself?
If you're thinking about doing this pattern, I'd encourage you to give it a try before committing to a full quilt top. This is not a fast pattern, and this is most emphatically not a pattern that tolerates sloppy work. You will have to pay attention. You will have to use good template material. You will need to go slowly.
But going slowly is not hard. Working carefully is not hard. It just means you are careful, considerate, and paying attention. Once you get the hang of the technique, it's actually a surprisingly mindless pattern. It just takes a while. A while. A LONG WHILE. I think the results are worth it, though. This is not a quilt pattern that is easy to ignore; it stands out. It moves. It breathes. It cries out for bold, simple color choices.
I hope there will eventually be more quilts made with this pattern. Maybe explaining how I did it will encourage someone to try!
Action shot!
This is Gabriel:
A slideshow of everything
Flickr photos from the album 2014-10 Octopus's Garden by domesticat
 Because I am batshit crazy that's why!
 That's two blocks done.
 Raw edges but a decent demo of four blocks, untrimmed
 View on Flickr
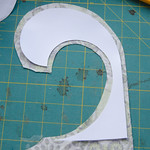 View on Flickr
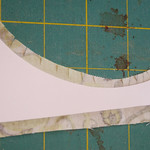 View on Flickr
 Corset-lacing on pieces
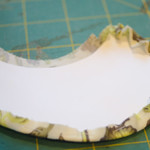 View on Flickr
 Sunday: more sewing and homemade bubble tea.
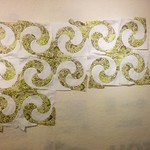 Back on the wagon.
 Work on the swirly #quilt continues. Kolohe supervises with his eyes closed.
 More completed squares. Slow going. But progress is progress. (Aiming for a 5x8 or 6x9 grid when done.) #quilt
 Jellyfish fabric!
 Current status: 20 blocks done
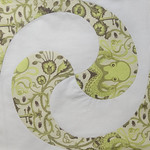 Single pattern piece
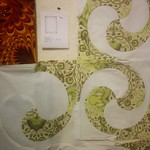 Endgame pieces
 Test sewing success!
 First full-width section
 Fabric: Octo Garden
 7 of 9 rows complete!
 With love and help from Staggertabs
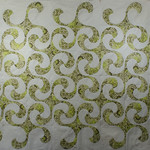 Finished top: Octopus's Garden
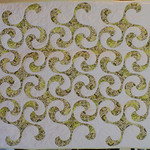 Octopus' Garden: complete!
 Achievement unlocked




Comments
Wow, you are creative and
Wow, you are creative and patient