Sevens and fourteens
It's been a long time since I've talked on this site about Seven Brides For Seven Brothers, but if you follow me on social media (twitter, facebook, pinterest) it's become clear in the past couple of weeks that I've gotten to work.
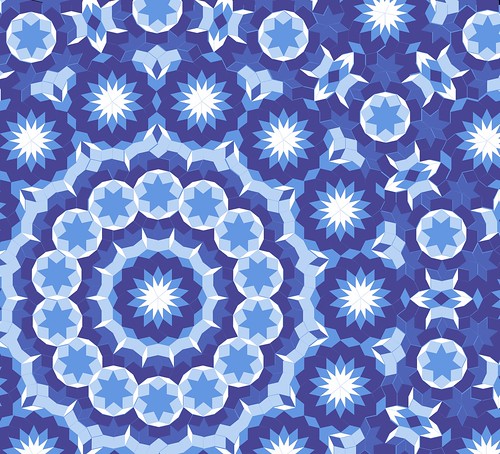
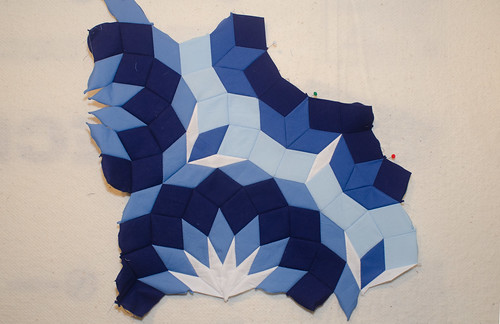
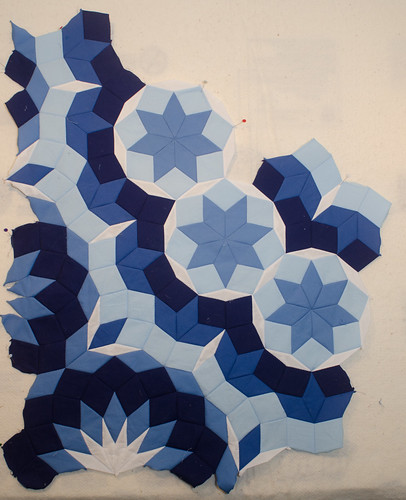
This quilt has been paused for several years, while life interfered, but fabric coming available to finish the top for Pentatonic meant that this quilt was next in the Big Ambitious Projects pile that would see the light of day. If you've not seen a photo of the schematic, before, behold the craziness that is a tiling based on sevens and fourteens:
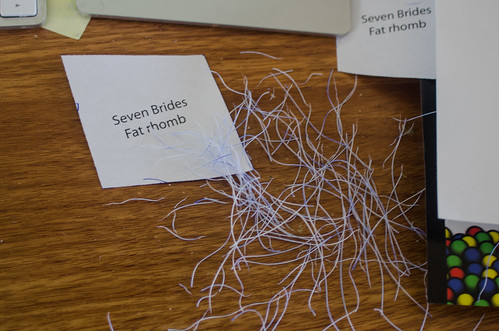
I took a photo of the tiling, worked backwards (thanks, basic geometry!) to work out the angles, and built pieces based on the math. Because there was no simpler way to do it, I used Adobe Illustrator, which is my go-to tool of choice for turning tilings into quilts. I created pieces that had the correct angles, and then resized them so each piece was the same size. This tiling requires three pieces, which I lovingly refer to as "fat rhomb," "medium rhomb," and "skinny rhomb." (Original. I know.) The pieces can be any size, but all three have to be the same size.
Looking at the rhombs, it was clear from the outset that the skinniest rhomb was going to be the limiting factor; how small could it be before it was too unwieldy to work with? That skinny angle was 25.714° (because 14 of them meet at a point to form a circle, and that's 360° divided by 14) and that makes for a wicked, narrow, sharp point. Once upon a time, I was crazy and thought that I'd be able to successfully machine-piece this quilt, and I quickly discovered this idea was utter crap. Making seven-pointed stars was hard enough to get right, but a 14-pointed star is like Mordor. You don't go alone, and you go armed for bear and warlocks.
Using the skinny rhombs as a guide, I resized the pieces as small as I thought I could successfully wrangle, and laid out enough of the pattern in Adobe Illustrator to get what I wanted. I matched the colors to Kona solids to get as close of a color match to the schematic as possible. I toyed briefly with the idea of using a patterned fabric, and then I realized I wanted nothing but the piecing to show through. I settled on Kona's white, "Nightfall," "Regatta," and "Lake."
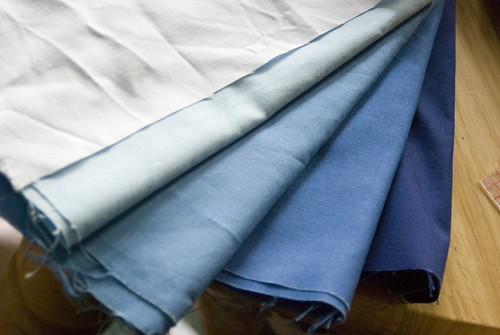 Color samples for a future quilt
This is where I labored under the adorably mistaken assumption that I would be able to machine-piece this top. I got partway through -- maybe a quarter of the way through assembling units -- before admitting to myself this was utterly bonkers, required tons of ripping out, and wasn't giving me the razor-sharp accuracy I wanted. That's when I paused, and took up English paper piecing. I chose to work my way through Pentatonic (based on fives, and with much larger pieces) before tackling this more technically difficult composition.
I didn't anticipate running out of fabric on Pentatonic, nor of some of the life events that happened between 2010 and 2014, and so this quilt waited. In 2014, I lucked into fabric that allowed me to restart Pentatonic the way I wanted, and bring it to completion. (Okay. I lie. The top is 95% completed, as I have a few stars to swap out, but it's otherwise done.)
 Pentatonic, before star substitution
By the end of Pentatonic, I considered English paper piecing no big deal. The weekend after finishing principal assembly on Pentatonic, I pulled out the pieces for Seven Brides and started tinkering with them. I was aware that I could pay someone to laser-cut paper pieces for me, but I've learned in the years since that custom patterns either require a one-time surcharge which I consider hefty, or I have to make the pattern available for sale. Since this tiling isn't mine (see http://quadibloc.com/ for the source) I don't have the right to sell it, and I was unwilling to pay a massive surcharge just to get paper pieces. I wanted to use Mylar, or some other bendy plastic, anyway. I wanted to avoid the holes inherent in sewing the 14-pointed stars by machine, as you can see here:
I tried sewing a test, and even with English paper piecing, I was unhappy with the look. The white portions of the stars left seam allowances so big that the center of each star would have an unsightly bulge. (There's a reason people don't do this in fabric: it's batshit crazy and doesn't work.)
Unless.
Unless you change your materials.
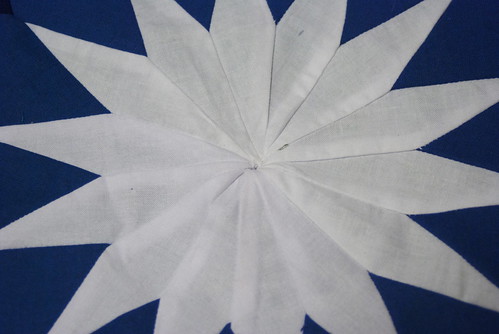
I went digging in my stash and pulled out the swath of Tana Lawn, Liberty's magnificent lightweight lawn. It's light, soft, drapes beautifully, and made with exceptionally thin and strong thread that is tightly woven. It makes a fabric that's lighter in weight, by far, than standard quilting weight cotton. It frays less. It's obedient, lies flat, and takes English paper piecing beautifully as long as you use a thinner needle to get in between the tightly-woven threads. So I sewed another test using a combination of Kona solids, Liberty Tana Lawn for the white, and handmade plastic templates for piecing:
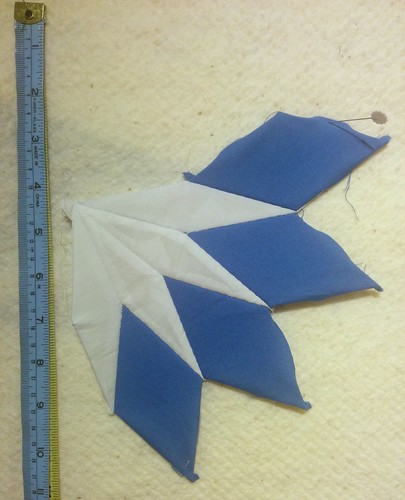
and immediately realized I had screwed it up AGAIN. I'd forgotten the first rule that woodworkers know: when you mark a template, or a finished piece, you don't cut your pieces and leave the tracing marks on them. That leaves your finished pieces ever so slightly too big. Normally in quilting it doesn't matter, but a single thickness of fabric isn't infinitely thin. Most piecework doesn't require this level of accuracy, but when you have 14 pieces of fabric meeting at a point, that's 28 thicknesses of fabric (one for each side of the point) that must be accounted for. My pieces didn't fit, and wouldn't fit, until I shaved them all down to remove the trace marks around their exteriors:
Once I did this, everything fit! I started sewing a test, and realized within a few nights that it wasn't just a test piece any more, it was the real deal. I had, somewhat accidentally, started the top for real this time. My first test was to ensure the rosettes would fit without cupping or bowing, and after a few nights, I knew this to be the case. You can see my test point in the left-hand side, and how I realized the seams were too big -- there's a section of medium blue that curves forward because the pieces are the wrong size. They'll be trimmed off in the finished quilt, so I chose not to re-sew them:
My next test was the seven-pointed star. Would the seven-pointed star lie flat? Would it fit into the pattern, thus guaranteeing I had my pieces correctly shaped this time? The answer: yes, thankfully, yes. The white pieces require about one millimeter of fudging to make sure the points hit correctly, but I'm willing to accept that:
As of today, I've completed a few stars, and started slotting in the borders for the first couple of stars. My goal is to make a landing place for the big, showy center rosette.
Before I go much further, I want to ensure that I can create a 14-pointed star that's just as tightly constructed as the rest of the top. Every quilter who sees this quilt will zero in on the white pieces, so that's my technical focus. If I nail those, the rest of the quilt is easy.
I never settled on a recipient for this quilt. I suspect I will keep it, and put it on my bed. Every time I tried to imagine someone who would love this quilt, and understand it, I tried to imagine them using it and I just couldn't see them doing anything with it except putting it away in a closet because it was Too Unique To See Use. I loathe that. The ony person I know who would truly love and value it lives in a climate that doesn't need quilts, so I think I'll hang on to it.
My cats have no idea how good they have it!

